
Grade 2 – Structures and Mechanisms
Lesson Summary: Students will create an animated story in which a simple machine makes a task easier for a person or
community.
Curriculum Expectations: These expectations are intended to highlight the many ways in which this lesson could support
the curriculum. It is neither expected nor necessary for teachers to address all of these expectations at once. Teachers
are encouraged to select the most relevant expectations based on their unique context and intentions for the lesson.
Science & Technology
Mathematics
Language - Writing
Overall Expectations
A2. use coding in investigations and to
model concepts, and assess the impact
of coding and of emerging technologies
on everyday life
A3. demonstrate an understanding of
the practical applications of science and
technology, and of contributions to
science and technology from people
with diverse lived experiences
D1. assess the impact of simple
machines on society and on the
environment
D2. demonstrate an understanding of
movement and ways in which simple
machines help to move objects
Specific Expectations
A2.1 write and execute code in
investigations and when modelling
concepts, with a focus on decomposing
problems into smaller steps
A2.2 identify and describe impacts of
coding and of emerging technologies on
everyday life
A3.3 analyse contributions to science
and technology from various
communities
D1.1 assess the impact of simple
machines on the daily lives of people in
various communities
D1.2 assess the impact on the
environment of technologies that use
simple machines to facilitate movement
D2.1 describe different ways an object
can move
D2.2 identify ways in which the position
of an object can be changed
D2.3 identify the six basic types of
simple machines: lever, inclined plane,
wedge, pulley, wheel and axle, and
screw
D2.4 describe ways in which each type
of simple machine is used in daily life to
make tasks easier
Overall Expectations
C3. solve problems and create
computational representations of
mathematical situations using
coding concepts and skills
Specific Expectations
C3.1 solve problems and
create computational
representations of mathematical
situations by writing and executing
code, including code that
involves sequential events and
concurrent events
C3.2 read and alter existing code,
including code that involves
sequential and concurrent events,
and describe how changes to the
code affect the outcomes
Overall Expectations
1. Generate, gather, and organize
ideas and information to write for an
intended purpose and audience
2. draft and revise their writing, using
a variety of informational, literary,
and graphic forms and stylistic
elements appropriate for the purpose
and audience
Specific Expectations
1.1 identify the topic, purpose,
audience, and form for writing
1.2 generate ideas about a potential
topic, using a variety of strategies and
resources
1.3 gather information to support
ideas for writing in a variety of ways
and/or from a variety of sources
1.4 sort ideas and information for
their writing in a variety of ways, with
support and direction
2.1 write short texts using a several
simple forms
2.3 use familiar words and phrases to
communicate relevant details
2.4 use a variety of sentence types
3.4 use punctuation to help
communicate their intended
meaning, with a focus on the use of:
question marks, periods, or
exclamation marks at the end of a
sentence; commas to mark pauses;
and some uses of quotation marks
3.8 produce pieces of published work
to meet criteria identified by the
teacher, based on the expectations

Breaking Down the Coding Expectations in Science & Technology:
In the Grade 2 Science & Technology curriculum, there are 2 coding related expectations:
A2.1 write and execute code in investigations and when modelling concepts, with a focus on decomposing
problems into smaller steps
A2.2 identify and describe impacts of coding and of emerging technologies on everyday life
To paraphrase these expectations and express them in plainer language, students are being asked to:
● write code to demonstrate a science-related concept, focusing on understanding how each problem can be
split into individual steps
● show how coding impacts our lives
Both expectations will be addressed through the project.
Learning Goals: We are learning to write code to create an animated story where a simple machine makes a task easier
for a person or community.
Success Criteria:
1. I can use basic start blocks and movement blocks to code my characters to move
2. I can add appropriate backgrounds and characters that show simple machines in action
3. I can explain the idea of sequence in my own words
4. I can explain algorithms in my own words
STEM Profile:
Benjamin Banneker (1731-1806) was a Black mathematician, astronomer, and
inventor. Both of his parents were formerly enslaved but were free at the time of his
birth, so Banneker was also a free man throughout his life. He even wrote many letters
to and received letters from future American president, Thomas Jefferson, on the
importance of racial equality and ending slavery.
In 1752, he was the first in America to create a clock made entirely out of wooden
parts after borrowing and studying a pocket watch from a wealthy friend. This clock
worked with the help of a wheel and axle, with the minute and seconds hands
attached to the center of the clock working like a rotating wheel and the pin in the
middle holding the hands acting as the axle. His clock kept perfect time for more than
50 years until it was accidentally destroyed in a fire.
Like Benjamin, we will be using our knowledge of simple machines to show how they
can make our lives easier.
Minds On:
1. Students will have different experience levels when it comes to coding.
a. If students have never experienced coding before, please watch the “What is Coding?” video.
b. If students have experienced coding before, have a quick discussion in which students share their definition
of coding. Some responses to look for include:
i. Coding is the language that computers speak
ii. Coding is how we talk to computers or get computers to do what we want
iii. Coding is the instructions that we give to a computer
2. Introduce the idea of an algorithm, which is a set of steps we can give to a computer so it can perform a task. You
may want to watch this video to further explain the idea.

3. Similar to the concept of an algorithm is the concept of a sequence. A sequence is the order in which you write your
code and the order matters. Think of a recipe to make a cake; if the steps are put in the wrong order (think back to
the algorithm), the cake will come out all wrong. When writing code, a task needs to be broken down into smaller
steps and put in the right order for the algorithm to be successful.
a. Discussion: Can students think of a time when they did the steps of a task in the wrong order? What
happened?
4. Another key concept for students to understand is concurrent events. Concurrent events are when two or more
things are happening at the same time. In coding with Scratch Jr, this can mean two different characters are
performing actions at the same time (i.e., both characters moving across the screen simultaneously), or that a single
character is performing multiple actions at the same time (i.e., moving across the screen while spinning). There are
also many real life examples of concurrent events, such as walking and talking or eating and watching TV.
5. Brainstorm with students to come up with ideas for their project. This can be done in small groups or as a whole
class. Some sample prompts include:
a. What are the six simple machines?
b. How do the six simple machines work?
c. What are some real life examples of the six simple machines?
d. What are some ways in which each simple machine helps humans in everyday life?
e. How might we do the work if we didn’t have simple machines?
Planning Our Project: Provide students with the animated story project planner and encourage students to create three
or four scenes. If creating multiple scenes, each could depict the ways in which different simple machines make a job
easier or all of the scenes could focus on just one simple machine.
Students should create a rough sketch of what will happen in each scene by writing a few words or a sentence describing
what happens in the scene. Teachers may wish to provide a list of words from which to choose, a scribe, or other assistive
technology to support students.
Creating Our Project: Please see the “Sample Code” section of the lesson for screenshots and a full video showcasing a
sample project and all its code.
1. If you have not used Scratch Jr before, please consider watching the videos at the following links in order to
understand the basics of the platform:
● Scratch Jr Intro
● Scratch Jr Activities Guide
2. In the first page of the project, add the first background using the Change Background button (5).
3. Choose the main character and begin writing the code to move and animate the character. Students are encouraged
to use the “Say” block from the purple “Looks” menu to add dialogue to their story or to record and add a sound
from the green “Sounds” menu to add audio files to communicate orally. Students can also add multiple characters,
and even design their own characters using the Paint Editor if they wish. Make sure that all of their blocks of code
are connected to a trigger block, such as the “Start on Green Flag” block.
4. When students are ready to create their second scene, add another page.
5. In the second scene, add a background, characters, and write the code. Remember that the code for each character
and on each page is created separately. Students can copy a character and its code, if needed.
6. When students are happy with their second scene, go back to page 1. In the code for the character whose code
ends last, use the “Go to Page” end block to specify the page project. If students have already added multiple pages,
make sure to choose the correct page (look for the #). This will trigger the next scene to start automatically.
7. Repeat for any additional scenes.
8. To play the story, press the Green Flag button. Students are encouraged to use Presentation Mode to make their
story full screen.

Sample Code:
Option A: Video
Option B: Screenshots
Extensions:
● Students can explore examples of how simple machines are used in other cultures/societies/throughout history
● Students can use the camera on their device to take photos to serve as the background or as a character using the
Paint Editor.
● To learn more about Benjamin Banneker or topics related to simple machines, consider the following books and
videos:
o “The exceptional life of Benjamin Banneker” from TED-Ed
o “Science Max – Simple Machines – Full Episode” from TVOkids
o Simple Machines: Wheels, Levers, and Pulleys by David A. Adler
Sharing Our Work/Consolidation: Students can share Scratch Jr projects using these steps.
1. Students should be provided with time to share their projects with others and to engage in self and peer
assessment. This can be done in a variety of different formats, including a gallery walk, whole class presentation, or
“trading” their project with another student. Students can provide feedback in a variety of ways, including written
and verbal. A variety of feedback options and templates are available in Appendix A.
2. An important aspect of assessing student understanding is focusing on the process, not the product. While it is
important to have a final product that functions as intended, students are often asked to produce something within
a limited time frame; therefore, it may be the case that, given more time, a student would be able to produce a
fully functional product.
To assess learning, teachers can conference with students throughout the creation of their projects using the
anecdotal prompts in Appendix B and documenting these discussions using an anecdotal observations chart.
Teachers are encouraged to consider the troubleshooting strategies used by students throughout the project, their
ability to explain how their project works, and what they might do differently in the future.
3. A rubric can be used to evaluate the final product. This and other assessment and evaluation tools can be modified,
as needed.
Low -Tech/No-Tech Modifications:
● While it is ideal to have one device per student, this is not the reality for many classrooms. If you are planning to
have students work in groups, consider a maximum group size of 2 students to ensure as much “hands-on” time
with coding as possible. If access to devices is limited, you may wish to implement this lesson as part of a station
rotation within your classroom or use another strategy to work with small groups.
● Scratch Jr does not require access to the internet beyond downloading the app.
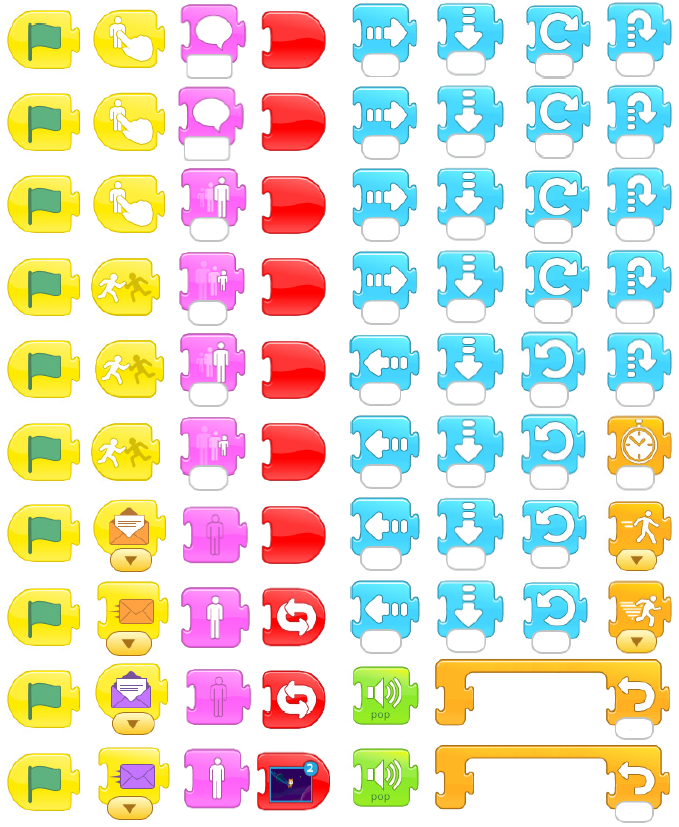
● If you have no access to devices, you can:
o print these cards from Scratch Jr, cut them out, and have students create their code with the paper blocks
instead
o use these templates to create printable stickers and use the stickers to allow students to create their code
o You may also wish to print out images of the background scenes and characters to further support students
Appendix A: Self and Peer Feedback
• Student Self Assessment
o Thumbs Up
o WIN
• Peer Assessment
o Two Stars and a Wish
o TAG

Appendix B: Anecdotal Prompts
Throughout the time when students are creating their projects, teachers are encouraged to circulate and conference
with students to discuss their projects and progress. The process is just as, if not more, important than the final product
when it comes to coding, so this is key to truly understanding a student's understanding.
Key Concepts
Students should be able to identify, name, and explain key coding concepts in their own words; for example, sequence
can be described as “the order in which you write your code matters”. Conditionals can be described as “if-then
statements that give your computer options to choose from.” The wording may be unique to each student, but they
should be able to explain the concept.
Suggested Prompts:
1. Can you tell me what you know about ______?
2. Can you show me where in your code you used _____? How does it work?
Application
There may be times when students “stumble” into the “right” answer in their code without fully understanding how
they got there, while another student may have a project that isn’t working the way they intend, but they know exactly
why and are able to very clearly articulate the steps they would take to fix the issue, if they had more time. Just because
a student’s project is not working exactly as they want it does not necessarily mean that they don’t understand so it is
important to take the time to discuss with students.
Suggested Prompts:
1. Can you tell me what this section of your code does?
2. It seems like this section of code isn’t working the way you want it to. Why do you think that might be? How
might you fix it?
3. What would happen if you made _____ change?
Troubleshooting/Debugging
In the world of code, a lot of mistakes are going to be made. Not only is this completely normal (and it happens to
professional computer programmers all the time), but it is actually HOW we learn to code. To move from making the
mistake into learning from it, students need to develop and utilize effective troubleshooting strategies. If a student just
sits there staring at their code for a week trying to figure out an issue without ever asking for help, they are not
demonstrating effective troubleshooting strategies. Effective troubleshooting strategies that students may demonstrate
include:
● Reading their code out loud to themselves to attempt to identify errors
● Sharing their code with a peer to ask for help in identifying an error
● Dealing with frustration by taking a break from their code
● Searching the web for answers to their questions
Suggested Prompts:
1. Can you tell me about a time where your code wasn’t working the way you wanted it to? What did you do to
fix it?
2. It seems like this section of code isn’t working the way you want it to. Why do you think that might be? How
might you fix it?
3. What are some mistakes you made when creating your project? What would you do differently next time?
